Understanding classes
Read the guide
Use classes to control which objects appear and how their lines and fills read on the drawing.
Name classes around the job they do
Keep overhead, cut, and reference linework distinguishable so you can control them independently. A class name with hyphens can create the nested grouping shown in the video. Pick a naming pattern you can keep using across related drawings.
Set graphics where they can stay consistent
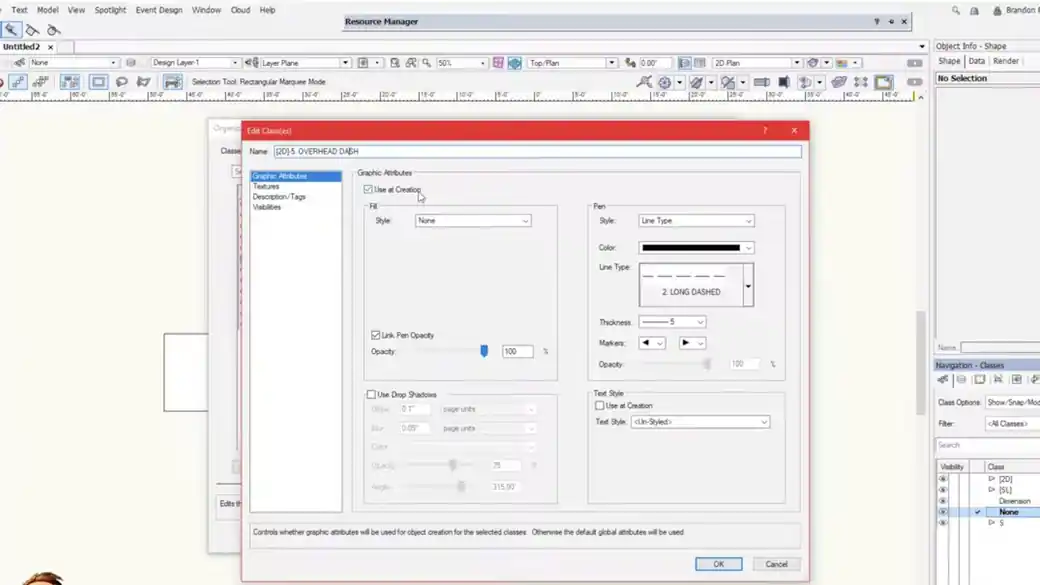
Use at Creation assigns class attributes as you draw. Check a new object’s attributes and class before troubleshooting a viewport that looks wrong. A line given its own attributes may read differently from a line using the class defaults.
Work through it
- Make classes that describe what the objects do in the drawing. Try separate classes for cut scenery, overhead scenery, and reference linework.
- Give each class a useful default line type, line weight, and fill. Set Use at Creation where you want new objects assigned to the class to start with its attributes.
- Change class visibility or graphics in a test viewport. Check that one drawing can show all relevant information while another hides references that would make it harder to read.
Quick reference
- Visibility
- Controls whether objects assigned to the class appear in a view.
- Default attributes
- Give a class consistent line weight, fill, or line type when the object uses the class settings.
- Viewport class settings
- Let two views of the same drawing show different information or a different visual hierarchy.
Put it into a scenic drawing
Draw overhead trim with a dashed line and cut scenery with a heavier continuous line. Keep them on the same design layer if they belong to the same part of the model.
What to check
If an object does not follow a class style, inspect its attributes. An individually assigned line weight or fill can override the default you expected.