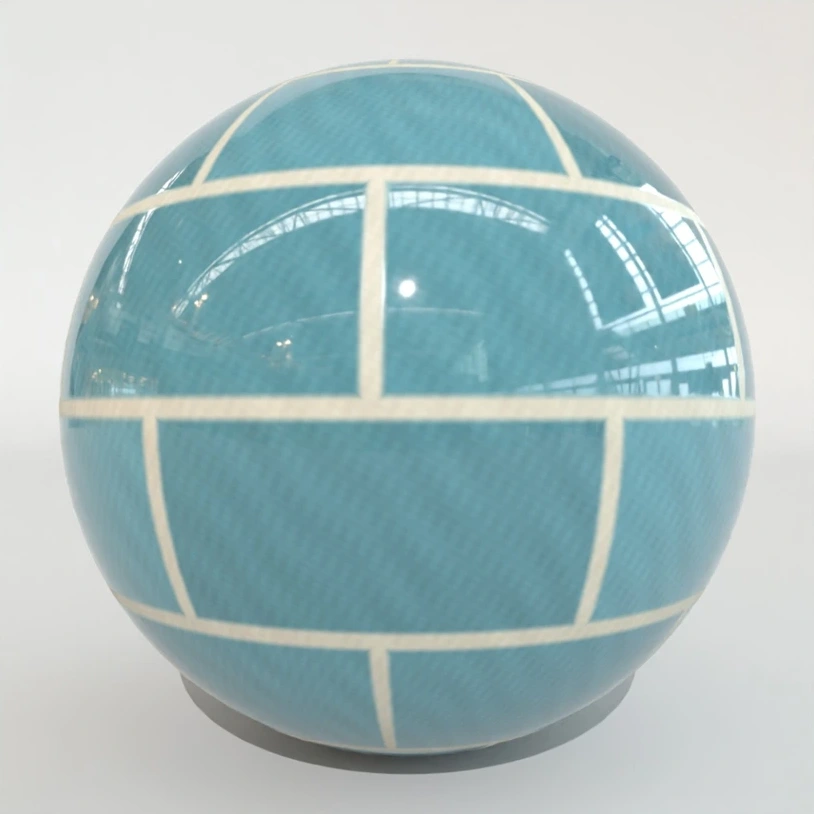
What happened to the four shader menus?
Hover over or tap a bold technical term for a quick definition.
If you used textures before Vectorworks 2027, opening Edit Texture was fairly straightforward. The four menus were Color, Reflectivity, Transparency, and Bump. If I wanted to put an image of brick on a wall, I knew where to start. I could add some bump for the mortar joints and get back to the model.
The first time you open the 2027 editor, that familiar list is gone from new textures. There’s Base, Specular, Transmission, Coat, Emission, and Geometry. Switch from Basic to All and the list gets longer. It can be frustrating to need a new vocabulary for a finish you already knew how to make.
If you’re new to textures, here’s how I think about it. The image gives the surface its pattern and color. The texture tells Vectorworks what should happen when light hits that surface. A photograph of blue tile can give you the color and the grout lines. It takes a separate roughness setting to make the tile reflect a bright light more sharply than the grout.
PBR stands for physically based rendering. Vectorworks 2027 uses OpenPBR, a shared way to describe how a material responds to light. For most scenic finishes, I’d open Basic, start with Base Color and Specular Roughness, and add settings as the finish calls for them.
| Before 2027 | Where I’d look in 2027 | What I’m trying to change |
|---|---|---|
| Color | Base → Color | The pigment or image on the surface. |
| Reflectivity | Specular for highlights, Base → Metalness for bare metal | How the surface catches light. Add Coat for a separate varnish layer or Emission for a glowing surface. |
| Transparency | Transmission for glazing, Geometry → Opacity for cutouts | Whether light passes through a material or the surface disappears in masked areas. |
| Bump | Geometry → Bump/Normal or Displacement | How light catches small details, and whether larger relief needs to change the rendered edge. |
A texture is the resource you apply to a model. An image map feeds one property inside that resource. Map Type, in Object Info, sets how the whole finish wraps the object. Those are three different decisions, and knowing which one you’re making saves a lot of time.
- Make your first texture
- Follow the glazed tile. Set color and scale first, then adjust the sheen.
- See what a map changes
- Watch the reflection where the tile glaze meets the grout.
- Fix a finish that looks wrong
- Start with what you can see, like a pattern that repeats too often.
Vectorworks Help · PBR textures · Basics of Textures · The earlier workflow
Image channels
Read the files in a PBR map set
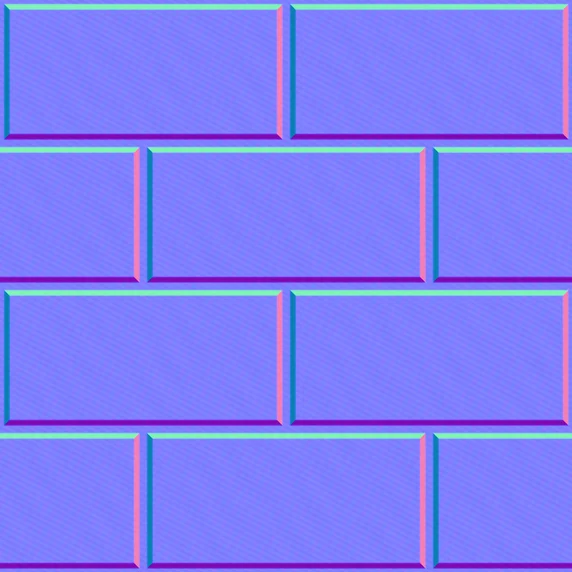
You might download a material and find four or five images in the folder. They usually describe the same patch of surface. I like to put them next to each other and find a feature I recognize. In this tile, the grout lines are in the same place in the color, roughness, height, and normal images. If the whole finish needs one value, set it directly. I’d reach for a map when two areas on the same surface need different behavior.
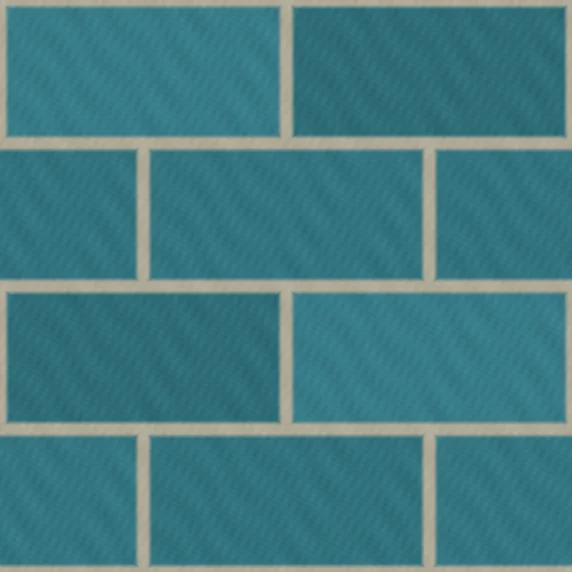
Teal glaze and pale grout
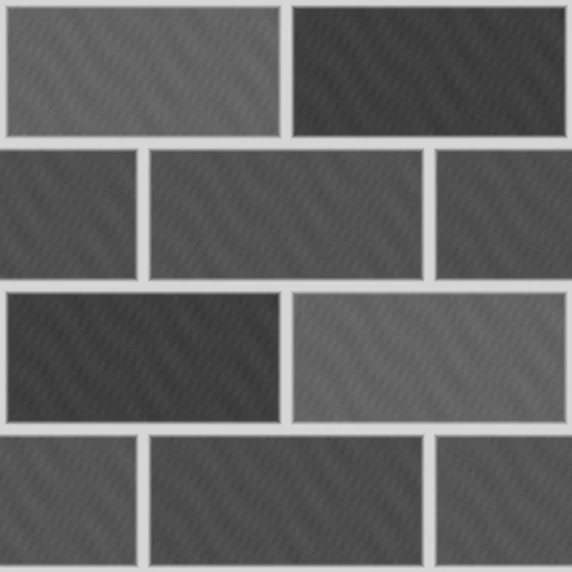
Dark glaze, light grout
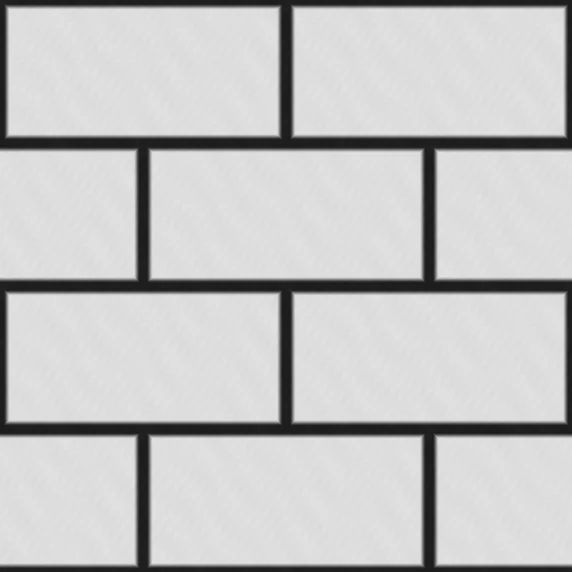
Light tile faces, dark joints
Color shifts at the tile edges
| File name or label | Vectorworks property | How to read it |
|---|---|---|
| Color, Albedo, Diffuse | Base → Color | RGB pigment. Use a clean, evenly lit image. A shadow baked into the file stays in place when you relight the model. |
| Roughness | Specular → Roughness | Dark is smoother and gives sharper reflections. Light is rougher and gives softer reflections. Invert an actual Glossiness or Smoothness map to use it here. |
| Metallic, Metalness | Base → Metalness | Black is nonmetal and white is bare metal. On painted steel, a mask can limit the metal response to chips and scratches that expose the steel. |
| Height, Bump | Geometry → Bump/Normal | Grayscale relative relief. Changes shading as light rakes the surface. A bump effect leaves the silhouette flat. |
| Normal | Geometry → Bump/Normal | RGB direction data, often purple-blue. Load the original RGB file. If the relief appears inverted, try the source’s alternate normal convention and compare visually. |
| Height, Displacement | Geometry → Displacement | Height data pushes the rendered surface in or out. Useful where the edge or cast shadow must show the profile. Check response in the final render style. |
| Opacity, Alpha | Geometry → Opacity | Black is transparent, white is opaque. Use an alpha mask for open holes in a grille, screen or stencil. |
| Emissive, Emission | Emission → Luminance | A luminance map varies glow brightness across the surface. Use Emission Color for the tint. Use it for a screen or letters in a lit sign. |
See each image on a surface · Try your own maps
Vectorworks PBR properties · Adobe Standard Material properties · glTF packed material channels
Base, Specular and Coat
Control the way a surface reflects
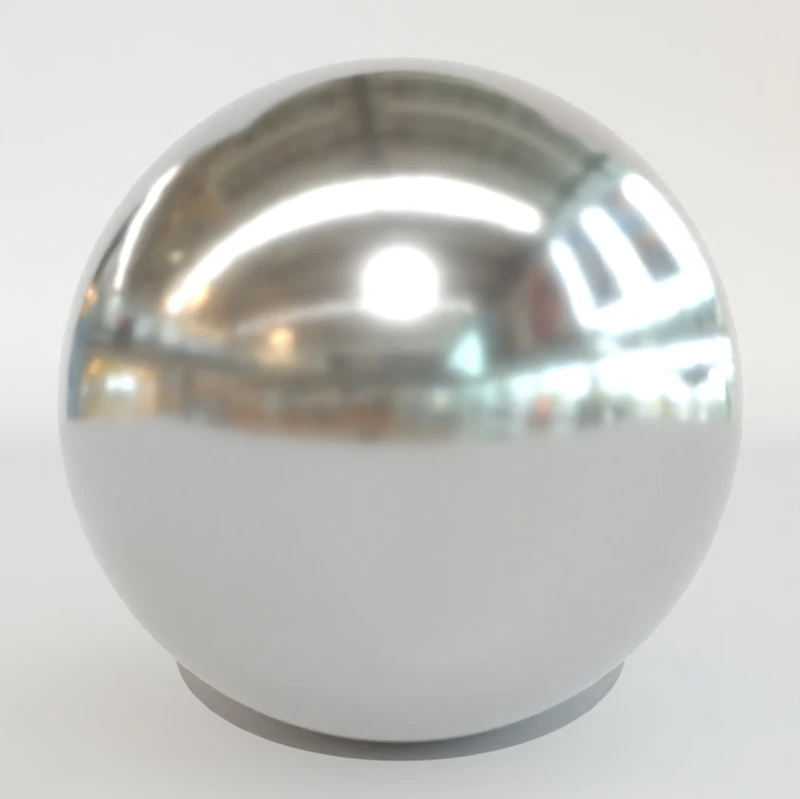
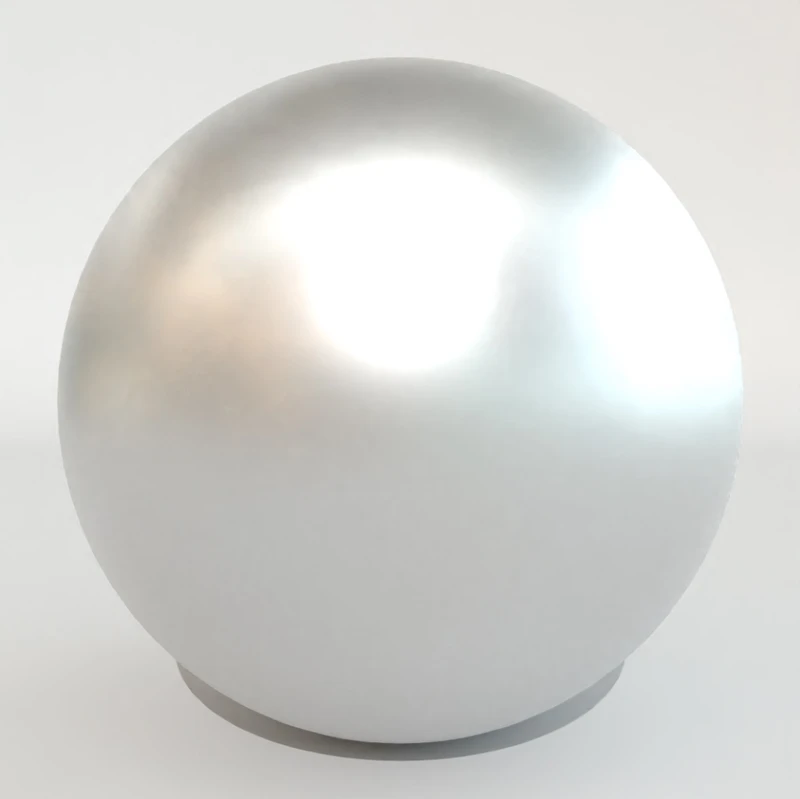
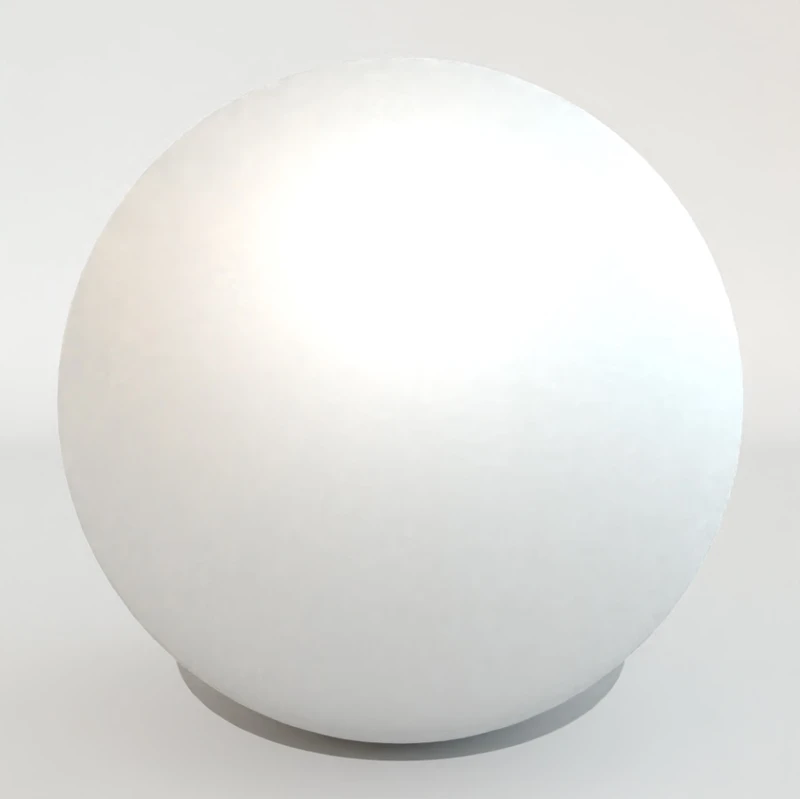
Specular is the reflected light you notice as a highlight or a recognizable image of a light source. Roughness controls how sharp that reflection looks. At a low value you can make out the light’s shape. At a high value it spreads into a soft patch.
 0.15 · Crisp reflections
 0.40 · Softer highlight
 0.75 · Broad highlight
- Base → Color
- The main color or pattern of the surface, like blue paint or printed wallpaper. Choose a color for a solid finish or load an image for a pattern. On bare metal, this color also tints the reflections. In All, Base Weight controls how much the base contributes, and Diffuse Roughness affects how powdery it looks.
- Base → Metalness
- Tells Vectorworks what the exposed surface is made of. Set 1 for bare brass or steel and 0 for paint, wood or plastic. A painted steel bracket has Metalness 0 on the painted areas and 1 where the steel shows through.
- Specular → Weight and IOR
- Specular Weight controls how strong the highlight is. Roughness controls how sharp it is. IOR, or index of refraction, affects reflection at different angles and how much light bends through glass. Watch the grid in the glass comparison to see that bend.
- Coat → Weight and Roughness
- Coat adds a second reflective layer, like clear varnish over wood. Weight controls how much of that layer you see. Roughness controls the sharpness of its own reflection.
Transmission, Emission and Geometry
Choose the effect before the setting
Ask what the light is doing. Does it pass through a pane? Does it pass through a hole? Or does it come from the surface itself? Each answer takes you to a different control.
Look through it
Transmission is light passing through a material, like a window. Transmission Weight controls how much passes through, and Color tints it. Raise Specular Roughness to blur the view through the glass, like frosting.
Cut holes in it
Opacity controls which parts of a surface are visible. For a grille, an image mask can hide the holes. Put that mask in the image’s alpha channel, the part of the file that stores transparency.
Make it glow
Emission makes a surface give off light, like the face of a backlit sign. Emission Color sets the color of the glow. Luminance sets its brightness in nits. Check light spill on nearby scenery in your final render.
Give it relief
Bump uses light and shading to suggest raised or recessed detail. A Normal map tells Vectorworks which way tiny parts of the surface face. Displacement moves the rendered surface, including at the edge. Compare the two profiles
Advanced controls that matter for scenery
- Fuzz and anisotropy
- Fuzz adds the soft sheen you see along the edge of velvet or on fine dust. Anisotropy stretches a highlight in one direction, like the streak you see along brushed metal.
- Subsurface, scattering and Thin Walled
- Subsurface Weight controls how much of a solid’s appearance comes from light scattering below its surface. Radius controls how far it spreads. Think wax or faux onyx. Transmission Scatter gives a milky effect within a transmissive material. Use Thin Walled for a sheet represented without solid thickness, such as a single glass surface.
- Thin Film, Tangent and Bevel Edges
- Thin Film adds angle-dependent color. Thickness changes the hue range, IOR changes the optical response, and Weight controls strength. Tangent sets a directional reference. Coat Normal affects detail in the top layer. Bevel Edges is a render appearance control for subtle softened edges.
Build a texture one decision at a time
Say I’m drawing a tiled floor for a set. I want the tile to catch a clean highlight and the grout to stay dull. I’d get the pattern and scale right first, then work on the sheen.
- Make the texture resource. In the Resource Manager, choose New Resource → Renderworks Texture → Create. Give it a name you’ll recognize in a long list, like Tile — Glazed Teal.
- Start with Base Color. In Edit Texture → Basic, open Base and select Color. The image button below the list lets you import a map. For a solid painted finish, you can choose a color and skip the image entirely.
- Set the real size of the repeat. Measure the width represented by the whole image. In the example, that’s 24 in. The image contains several tiles, so that measurement is the repeat width, rather than the width of one tile.
- Decide how the surface should catch light. Start with one value under Specular → Roughness. Where the tile and grout need different reflections, load a matching roughness map there. On a sphere in Realistic RS, look for the sharper tile highlights and softer grout.
- Check the finish on the model. Apply the texture to a filled 3D object. I use Shaded to check size and placement, then a Realistic RS style to judge what the finish does under light.
Object Info → Render
Choose a projection for the geometry
In Object Info → Render, Map Type controls how the entire finish lands on the object. Image maps such as Base Color and Roughness control the appearance of the finish itself.
Select the textured object, then select Overall or the relevant textured face, part or component in the Render tab. The Map Type controls how the pattern gets there. The available choices depend on the object.
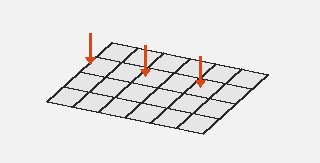
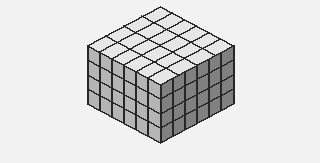
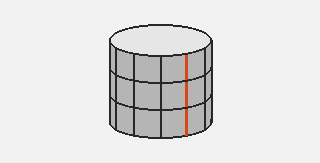
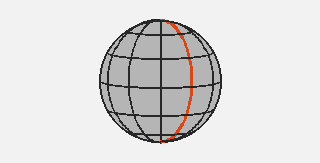
| Map Type | What it does | Where to use it |
|---|---|---|
| Plane | Projects the image from one flat plane. Geometry at a steep angle to that plane can stretch the pattern. | A deck top, scenic flat or sign face. |
| Auto-Align Plane | Projects independently and perpendicularly onto each face. The pattern can turn or break at a corner. | A faceted object with several faces that need projection. Check grain direction and joints. Where available, Follow longest edge sets the direction of U. |
| Cylinder | Wraps around an axis. The outer edges of the image meet at a seam. | The side of a column, pipe or drum. Check the top and bottom separately. |
| Sphere | Wraps around the object with a seam and convergence at the poles. | A round prop or globe. Put a seam and pinching where they will be least visible. |
| Perimeter | Follows the outline around a supported extrude or sweep. | Scenic fascia wrapping around a platform. Check where the repeat closes. The Overall choice governs when combined with Surface UV on a face. |
| Surface UV | Uses each surface’s own U and V coordinates. These are the two directions along that surface. | A curved or individually textured face where the pattern should follow the surface. Check adjacent faces for alignment. The Overall choice governs when combined with Perimeter on a face. |
| Roof | Uses the dedicated projection provided for a roof object. | Roof finishes such as shingles. |
| Imported | Keeps the original mapping of supported imported geometry. The usual mapping adjustments are disabled in this mode. | A mapped SketchUp or 3ds mesh. Change compatible mesh parts to another map type if they need remapping. |
Decide what receives the finish
Whole object. Drag the resource onto a supported object or use the Texture tool’s Apply to Object mode. One face. Use Apply to Face or hold Cmd on Mac / Ctrl on Windows while dragging a resource onto that face. For recurring assignments, use class or material settings when appropriate. Component-based walls, slabs and other objects expose different controls from a simple extrude.
Projection types and supported objects · Apply by object, face, class or material
Repeat and registration
Set scale with a known measurement
Measure what the whole image represents. In Edit Texture, Texture Size is the real-world width of one horizontal repetition. Pixel dimensions control image detail. The resource size controls its physical repeat.
- Texture Size and Set by Image
- In the square tile example, the full image represents 24 in. If you know a feature dimension but the full image width is unknown, click Set by Image, span that feature with the sizing line, and enter its Feature Size. For example, if a 6 in feature spans a quarter of the image width, the full repeat is 24 in.
- Scale, Rotation and Offset
- Set local Scale in Object Info → Render. A value of 2 doubles the projected repeat. Rotation turns the projected pattern. Offset H and Offset V shift it along the mapping axes. Align the grain first, then move the seam or grout line into place.
- Attribute Mapping tool
- Manipulate the projection directly on compatible objects in Plane, Cylinder, Sphere or Surface UV. Where the tool is unavailable, use the object’s Render controls.
- Repeat, Flip and world origin
- Repeat H/V controls whether the image tiles beyond its first placement. Flip mirrors it. World-origin controls, where available, can help patterns line up across adjacent objects when their scale and projection also agree. Use Reset to Default Mapping to remove the selected surface’s mapping adjustments.
Texture Size and Set by Image · Object Info mapping controls
In Vectorworks 2027
Texture Size and mapping in Vectorworks
Start in the texture resource to set the physical repeat. Switch to the object’s Render tab for adjustments on one instance.
Both views use the same 8 × 4 ft extrude, texture resource, view and Shaded render mode. One image repeat contains multiple individual tiles.
Compare one setting
Color and reflection maps
Start with the left render, then look at the right. The object, camera and lighting stay the same so you can see what one change does.
In the first pair, look for tile and grout. The thumbnail marked Map file is the image that adds that pattern. In Vectorworks, open the texture from the Resource Manager. Base → Color means expand Base, then select Color. The orange outlines show where to click.
Base Color
Edit Texture → Base → Color
Map fileRoughness map
Edit Texture → Specular → Roughness
Map fileMetalness map
Edit Texture → Base → Metalness
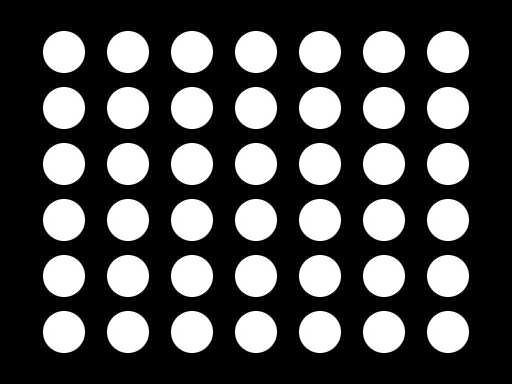 Map file
Compare one setting
Highlights and finish layers
Metalness
Edit Texture → Base → Metalness
Specular Weight
Edit Texture → Specular → Weight
Coat Weight
Edit Texture → Coat → Weight
Compare one setting
Glass and transmitted light
Transmission Weight
Edit Texture → Transmission → Weight
Roughness on glass
Edit Texture → Specular → Roughness
Index of refraction
Edit Texture → Specular → IOR
Compare one setting
Cutouts and illuminated surfaces
Opacity mask
Edit Texture → Geometry → Opacity
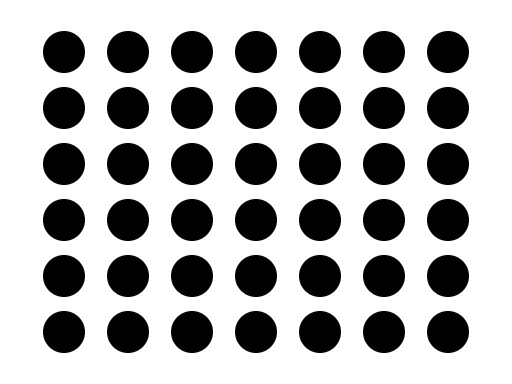 Map file
Emission map
Edit Texture → Emission → Luminance
 Map file
Emission Luminance
Edit Texture → Emission → Luminance
Compare one setting
Surface detail and silhouette
Grayscale height as bump
Edit Texture → Geometry → Bump/Normal
Map fileRGB normal map
Edit Texture → Geometry → Bump/Normal
Map fileBump strength
Edit Texture → Geometry → Bump/Normal
Displacement
Edit Texture → Geometry → Displacement (RS)
Compare one setting
Fabric sheen and pattern placement
Fuzz Weight
Edit Texture → All → Fuzz (RS) → Weight
Mapping Scale
Object Info → Render → Mapping → Scale
Mapping Rotation
Object Info → Render → Mapping → Rotation
Material Lab
How the texture is builtThis is where the individual controls start to make sense. Leave the camera and lighting alone for a moment and change one setting. Then orbit the model or turn the light off and see what still holds up.
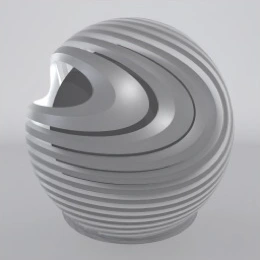
Drag to orbit · Arrow keys when focused
Frosted window pane
Try itSet Transmission to 1. Compare Roughness at 0 and 0.6. Can you still read the bars?
What should change?
The edges of the bars blur as Roughness rises. The pane still transmits light.
Live 3D studies in your browser. Each study links to its Vectorworks render and settings.
Try your own maps

Load a map, then compare the same 3D sample with and without it. Orbit both views together to see how the light moves across the surface. Maps stay in your browser.
Worked example · Glass
Frosted glazing
Vectorworks library · Glass Clear
Vectorworks library · Glass Frosted-Attr
The library swatches show the same test shape with two glass presets. Compare the definition of the bands viewed through each surface.
Place a checkerboard or window frame behind the pane. In Base, keep Metalness at 0. Set Transmission → Weight near 1 and Color near white. Start with Specular → IOR around 1.5. Duplicate the texture and change only Specular → Roughness to compare clear and frosted faces. Use Geometry → Thin Walled for a single surface. Test solid glazing with its modeled thickness.
Check the difference. Frosting softens the pattern behind the glass. If you can see right through cut holes with hard edges, check whether an opacity mask was used.
Worked example · Metal
Brushed brass
Vectorworks library · Metal Brass Brushed
Set Base → Metalness to 1 for exposed brass and use a warm Base Color. Give it a bright rectangular surface or environment to reflect. Compare two Specular Roughness values with the lighting fixed. Add Roughness Anisotropy for a directional brushed highlight and check its orientation on the rail. For painted hardware, set Metalness to 0. On chipped paint, a metalness map can reveal only the exposed metal.
Check the difference. A narrow reflection reads as polished. A broad reflection reads as satin. If the rail looks flat in both versions, improve what it can reflect before changing the texture.
Worked example · Glow
Light from a marquee face
Vectorworks · Realistic RS-Interior
Vectorworks · Realistic RS-Interior · same preview light
Both Vectorworks previews use the same lighting. At 300 nits the sphere appears brighter and its shaded side becomes harder to see.
Give the sign housing an opaque finish. Apply the glow texture to the sign face only. Under Emission, choose a warm Color and compare 0 with a higher Luminance, such as 300 nits. A luminance map can limit the glow to lettering or artwork.
Check the difference. Turn off the stage light and verify the face still reads as lit. In your final render style, check light spill on nearby scenery separately. Exposure and render settings affect how the glow appears.
In the Material Lab, select Glow and switch off the stage light to isolate the sign’s emission.
Worked example · Fabric
A soft highlight across a drape
Vectorworks library · Textile Denim Blue
The woven blue swatch is a starting point for scale and texture. For a velvet drape, model or use existing drape folds. Start with a deep Base Color, Metalness 0, and moderately high Specular Roughness. Switch to All and try a related tint in Fuzz → Color. Compare two Fuzz Weight values while keeping the camera, texture color and raking light fixed.
Check the difference. Look for a soft sheen along the folds in Realistic RS. If the whole curtain reads as polished plastic, back off the sharp specular response. For translucent backing, test Transmission separately with a light behind the cloth.
Worked example · Rock
Relief on a carved scenic rock
Vectorworks library · Stone Gray
The stone swatch shows surface grain on a simple sphere. To test a carved scenic rock, model the large shape and important breaks. Use a stone Base Color map, Metalness 0 and broad specular highlights. Load a matching grayscale height map or RGB normal map into Geometry → Bump/Normal for pores and small fractures. Try Displacement with a height map for a second test if the ridges need to affect the rendered edge.
Check the difference. Compare a straight-on view with a grazing view. Lower displacement if the profile looks exaggerated. Keep geometry for the larger forms that must read in drawings or close-up views.
Worked example · Wall
Pattern scale and seams
Vectorworks library · Brick Modular Running Bond
Use the brick courses in this Vectorworks preview as a visual ruler. On a wall, compare course height with a known dimension and check the pattern across a return.
For a wall with glazed tile, I’d start by checking the real-world width of the pattern and using matching Base Color and Roughness maps. Use the Texture tool’s Apply to Face mode to dress the audience-facing flat and its return individually. In Object Info → Render, use Rotation to align the courses and Offset H/V to land grout lines at the corner and at panel joints. Choose a separate finish for the backs of the flats.
Check the difference. At Scale 1, four repeats fit along an 8 ft run. At Scale 2, two fit. Compare the actual Vectorworks deck screenshots in Texture Size and mapping in Vectorworks to see the same scale change on an extrude.
Bump vs. displacement
Both samples use the same height pattern. Bump changes the surface directions used for shading. Displacement moves the rendered surface.
Interactive profile diagram. See the rock example for a Vectorworks application.
Checks before the final render
Diagnose what you see
Use Shaded to check placement, size and broad material appearance. Test the finished surface with the Realistic RS render-style type wherever the full PBR response matters. A photograph, the editor’s preview and the final stage view all have different lighting.
| Symptom | First check | Next move |
|---|---|---|
| Object is white or wireframe | Is it filled 3D geometry in Shaded with textures enabled? | Check the actual object or face assignment in the Render tab. |
| Pattern is the wrong size | Check the resource’s horizontal Texture Size against a known dimension. | If only one object needs correction, check its local Scale. Use Rotation and Offset after the repeat reads correctly. |
| Pattern streaks around a return | Check whether a Plane projection is hitting a perpendicular face. | Try Auto-Align Plane or a separately mapped face. Use Perimeter if a supported extrude needs a continuous wrap. |
| Metal or gloss looks dull | Check the light or environment being reflected. | Verify Metalness for the visible substrate and check if an inverted glossiness map was supplied. |
| Grout looks raised or the detail is missing | Check whether the imported file is height or RGB normal data and whether it matches the color map. | Try a raking light. For inverted-looking RGB normals, check the source convention. For too much relief, lower its intensity or use a gentler map. |
| Glass, fuzz or glow changes between previews | Check the render style and the property’s (RS) label. | Test Realistic RS where supported, then check under the actual scenic lighting. Inspect emission spill and transmission separately. |
Further reference
- Adobe Substance 3D · OpenPBR · Visual comparisons of material properties
- Vectorworks 2027 new features · The texture modernization release note
- Vectorworks render styles · Shaded, Realistic and Realistic RS
- Vectorworks file health · Texture resolution checks
- Basics of Textures · Brandon PT Davis’s walkthrough of legacy texture concepts